QlabTutorial@gmail.com
4178481383
QlabTutorial@gmail.com
4178481383
Live Cmaera’s in QLab
Justino Zoppe | Nov 07, 2019
HOW TO USE LIVE CAMERAS IN QLAB
I have been getting asked a lot about using IMAG in Qlab. (IMAG = Image Magnification)
Live Cameras are a very large part of my shows for many years now, and that wouldn’t have been possible without Qlab. Each show will have different needs and require different hardware to accomplish the effect they require.
For instance, when I perform close up magic I use am HD Sony Camcorder, https://amzn.to/2NsZDy7
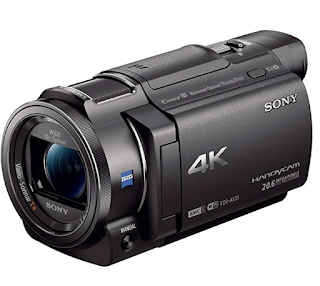
as I require control over exposure, white balance, and optical zoom, in addition to the fact I face the audience with the video walls behind me so I cant actually see what’s on the screen without looking behind me, so having a camcorder with a flip screen allows me to always monitor any possible glare from the lights, if im centered in the screen or if I need to zoom in out out etc..
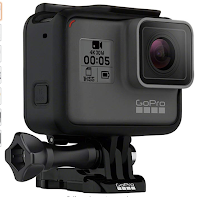
However, when I am performing certain routines without a table, I currently use a GoPro 5 camera
https://amzn.to/2WRxtzR
I use this link because it’s commerce packaging and only $169.00
The GoPro works fantastic for face on Live Camera shots where you do not require a Zoom Feature.
the Go pro also does not have a Screen facing forward so I always perform facing stage right which allows me to glance at the LED wall, with the corner of my eye, however, due to GoPro wide angle it’s nearly impossible to not be in the shot! I will give some advice however when using GoPro, you will get a fisheye distortion on the sides, really noticeable in one of my routines where im performing with 2 vertical columns which looks like bananas on the screen if I don’t change the settings in the GoPro from Wide or Narrow to LINER. Liner immediately zooms in a bit and also straightens the entire image and prevents that fisheye look, which you may or may not want.
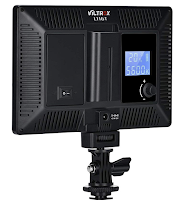
as far as lighting goes, yes I always use stage lighting, but I also always have my own camera lights attached directly on top of the cameras to prevent any issues live in the show,
I also love the fact that these lights are battery and have both brightness and color adjustments.
https://amzn.to/2PXmUtE
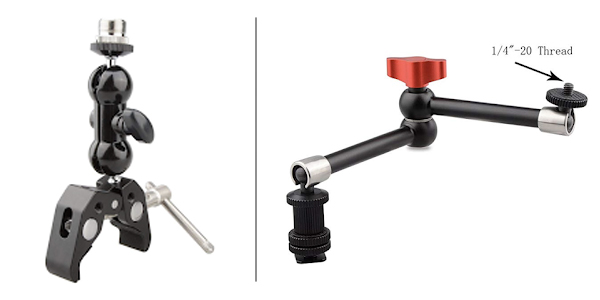
Since I have to fly to 90% of my venues, I cannot afford to bring camera stands for the 4 live cameras I would have 40lbs in excess baggage just for the stands, so I found this great hack by using these simple clamps, and then all I do is ask for 4 mic stands which every venue has mic stands, and tada instant camera stands that fit in your carry-on luggage!
https://amzn.to/2qtQMTN combined with these extension arms https://amzn.to/2CkLKLS
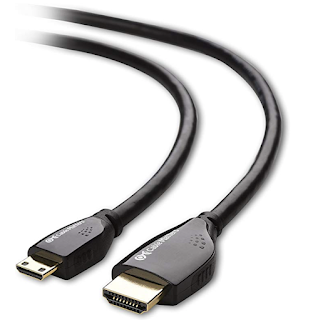
Once your cameras are mounted and lights adjusted I then use a 25′ or Longer
HDMI cable to run the feed to the Mac backstage.
https://amzn.to/2WTFXq0
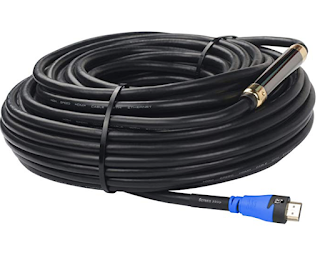
remember if you need a really long run you will require a BOOSTED HDMI as you cannot just extend HDMI too long of a run and you will lose connection. I have run over 150′ before for many shows and I use these boosted HDMI’s which NOTE: also are directional so when plugging them in, make sure you have the arrows facing the correct direction for the run.
https://amzn.to/2CoIsY3
Once you get the HDMI cable from the camera to the Mac, you will need a HDMI Capture Card, and although yes I think Black Magic is a Top quality product and the industry standard, my new favorite capture card is the USB thats right I said USB! Magwell USB to HDMI HDMI Capture
https://amzn.to/2CoIsY3
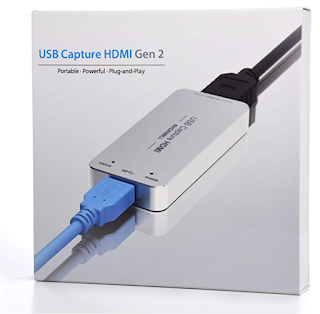
Special Thanks to Charles Peachock from Audio Ape Remotes for bringing this great capture device to my attention. I have been using this in my shows for over a year now and Knock on Wood, I’ve never had a single issue with it! The only this I feel you should be aware of, is the device does get pretty hot, so make sure you give it some ventilation.
Once you have all of this plugged in.. thats it! there is nothing to download no drivers to install just open Qlab and you will see under the video settings, CAMERA PATCHES, just change it from Facetime Camera to USB MAGEWELL (or whatever is shows?)
and now you can start programming live video in your shows, and then when you want to take it to another level start messing around with Effects, Geometry, Custom Masks and more!
I do teach all of this on my Qlab Tutorial website
just click, “Advanced Video Series” (shameless plug 😂)
If you have any questions feel free to visit my Qlab Facebook Group at
https://www.facebook.com/groups/703563116782430/
Like, Follow & Share. Thanks!
![]()
![]()
![]()
![]()
Latest Posts
 Adventures in Qlab Show ControlDecember 27, 2019
 Vanish Magazine ArticleNovember 27, 2019
 In The MediaNovember 24, 2019
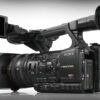 Live Camera’s in QLabNovember 7, 2019
 Announcing QLab 4.5October 29, 2019
 What you will need to run QLabOctober 28, 2019
 Options for using Video with Qlab, and the adapters you will need.October 4, 2019